Understanding Attachments in ServiceNow
This article was originally written in February 2016, but was last updated on 4/21/19.
Attachments in ServiceNow are not as straight-forward as email attachments, and it’s not always obvious how to do what you want with them.
Recently, I needed to copy some attachments programmatically and otherwise fiddle around with attachments. After finding nothing in the ServiceNow product documentation, and very little through the usual search channels, I figured it was time to write an article about how to programmatically deal with attachments in ServiceNow.
Note: This article discusses some little-documented APIs. As always, be careful to note anywhere you use such APIs, in case they are not supported in a future update. I recommend using try {} catch() {} blocks around any undocumented function, with a very clear log message in the catch.
Index

You may be aware that you can store more than just text within ServiceNow, in the form of attachments. You can store binary data as well, including pictures, audio, and even executable files; but what happens when you upload a binary file as an attachment, to ServiceNow?
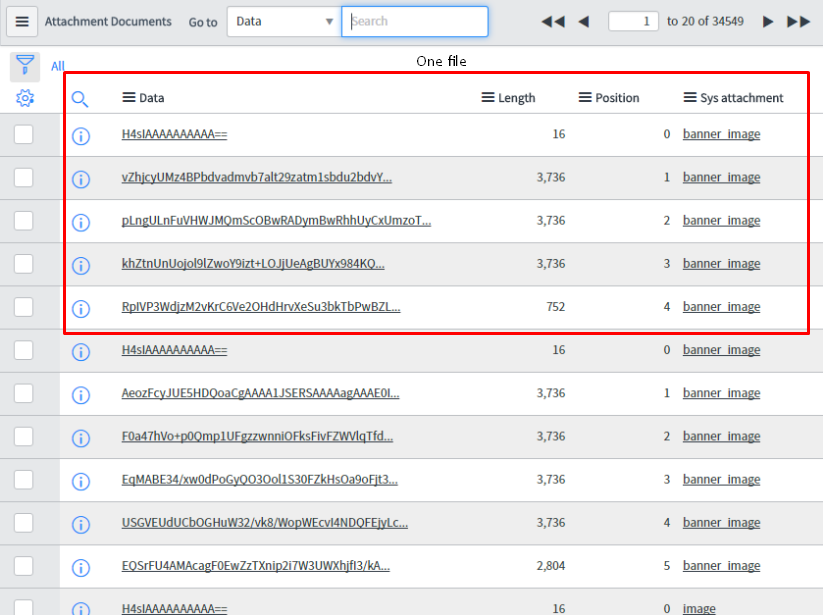
There are two tables which do the work of dealing with attachments: Attachments (sys_attachment), and Attachment Documents (sys_attachment_doc). When you upload an attachment file to ServiceNow, a record is created in the Attachments table with some metadata, including the file name, content type, and the size of the attached file.
The actual binary data of the file is split into ~4KB (3736 byte) chunks, which are then saved into the Data field of the Attachment Documents table. This table has a few other interesting fields, such as length (which defines the number of bytes stored in this chunk), and position (which defines what order this chunk of bytes fits in). The Attachment Documents table also contains a reference field (sys_attachment), which points to the parent record in the Attachments table.
This means that each attachment file will have one or more entries in the sys_attachment_doc table, which corresponds to the binary data of the original file that was attached. The Position field determines the order of the data in sequence, for when ServiceNow needs to re-combine the data into the original file (such as when a user wants to view or download it).
 ServiceNow Attachment Documents table binary data
Now that we understand more about the nature of attachments, we can easily come up with some cool ways to manipulate and work with them!
ServiceNow Attachment Documents table binary data
Now that we understand more about the nature of attachments, we can easily come up with some cool ways to manipulate and work with them!
Whether you’re reading a text file that came over from an import, or parsing the XML payload of a Shazzam discovery probe that ended up being too many characters for the payload field on the form (and thus got put into an attachment file), it is not uncommon to need to parse text (especially XML) from an attachment. Luckily, that’s not terribly difficult! We’ve just got to know a few tricks.
Below, I’ve included some code that will retrieve (and then print) the contents of a text attachments file, followed by an explanation of how it works. In this case, I’m using a simple .txt document with the contents: “This is an example text document.”
Note: Since ServiceNow has implemented scope in what might be the most haphazard, unintuitive, and bone-headed way possible, there are actually two completely separate solutions for this, depending on whether you’re running your script in the global scope, or in a scoped app. The sub-sections below, explain how to accomplish this in both.
If you want to get the text contents of an attachment file from ServiceNow in a scoped script, you might find it to be simultaneously a bit easier (no need for wonky package-calls; woo!) but also a smidge harder in some ways.
The good news is, that there’s a method of the scoped versions of GlideSysAttachment that’s meant to do basically exactly this for us.
The less-good news, is that you have to give it an actual GlideRecord containing the sys_attachment record in question.
That’s no big deal though, as I’ve written a simple function to get that for you: getAttachmentRecord(), which you can see in the script below:
You’ll notice that this script is much longer than the global version, but that’s mainly because I’ve written an abstracted/generalized method for retrieving the GlideRecord object for a sys_attachment record representing an attachment on another record, in a really modular way. Once we’ve got that, it’s pretty easy to do what we’re trying to do.
The main difference between this script, and the global one (below), is that on line 5, we pass the GlideRecord for the attachment itself, into the .getContent() method of the scoped GlideRecord class to simply retrieve the contents of the file as a string of text! For text files, this will give us exactly what we’re looking for.
var recordTable = 'incident';
var idOfRecord = '755d52b137b0b30090b68cf6c3990e6f';
var grAttachment = getAttachmentRecord(recordTable, idOfRecord, 'example text doc.txt', true);
var gsaTextFile = new GlideSysAttachment();
var strContents = gsaTextFile.getContent(grAttachment); //ONLY worked in non-global scope

gs.info(strContents);


/**
 * Get the GlideRecord object for an attachment on a given record.
 * @param {string} recordTable - The table name for the record that has the attachment. Example: "incident".
 * @param {string} idOfRecord - The sys_id of the record that has the attachment.
 * @param {string} [nameOfFile] - The name of the attachment file to retrieve.
 * @param {boolean} [exactMatch] - Whether to look for an exact match on the file-name provided. If false (or unspecified), a "starts with..." query will be done.
 * This param only applies if a valid file name is provided.
 * @returns {GlideRecord|boolean} - The GlideRecord for the related sys_attachment record.
 */
function getAttachmentRecord(recordTable, idOfRecord, nameOfFile, exactMatch) {
	var grAttachment = new GlideRecord('sys_attachment');

	grAttachment.addQuery('table_name', recordTable);
	grAttachment.addQuery('table_sys_id', idOfRecord);

	if (nameOfFile && exactMatch) {
		grAttachment.addQuery('file_name', nameOfFile);
	} else if (nameOfFile) {
		grAttachment.addQuery('file_name', 'STARTSWITH', nameOfFile);
	}

	grAttachment.orderByDesc('sys_created_on');
	grAttachment.setLimit(1);
	grAttachment.query();

	if (grAttachment.next()) {
		return grAttachment;
	}

	gs.debug('Attachment for record on table ' +
		recordTable + ' with sys_id ' + idOfRecord +
		' not found with the specified arguments.');

	return false;
}
In the “global” scope (which is really not all that global, as we’ll see), there is a completely different GlideSysAttachment class, than what’s documented. In fact, despite the fact that it’s been around since before scope even existed in ServiceNow, the “global” version of the GlideSysAttachment class is not documented at all.
Because of these facts, we have to use some dark sorcery (aka - package calls) in order to get the text contents of a file in the “global” scope.
 Learning ServiceNow on Amazon
On lines 1 and 2, I’m just declaring the table and record that I’m working with. In your case, these values will be different, and might be assigned differently, depending on how you’re using this code. All the important work is being done in the getAttachmentContentsAsString() function, which I call on line 3.
Learning ServiceNow on Amazon
On lines 1 and 2, I’m just declaring the table and record that I’m working with. In your case, these values will be different, and might be assigned differently, depending on how you’re using this code. All the important work is being done in the getAttachmentContentsAsString() function, which I call on line 3.
var tableName = 'incident';
var recordID = '755d52b137b0b30090b68cf6c3990e6f';
gs.print(getAttachmentContentsAsString(tableName, recordID));

function getAttachmentContentsAsString(tableName, recordID) {
	var gsa = new GlideSysAttachment();
	var bytesInFile = gsa.getBytes(tableName, recordID);
	var dataAsString = Packages.java.lang.String(bytesInFile);
	dataAsString = String(dataAsString);

	return dataAsString;
}
On line 7, I declare an instance of the undocumented global GlideSysAttachment class, as the variable gsa. While this class is used in two scripts in the ServiceNow documentation, there is no actual documentation on it in the global scope, at the time of updating this article (4/21/19).
Note: A scoped version of this class is now documented, but some of the methods we need to use in scoped scripts, are not available on the global version of GlideSysAttachment.
On line 9, I use an undocumented method of the GlideSysAttachment class: getBytes(). This returns the raw bytes of the file — that means binary data. This sets us up for what we’ll do next on line 11, where we convert that data into a string using Packages.java.lang.String().
Why such a strange package call?
The byte data exists within the underpinning platform that ServiceNow uses, which is called Rhino. Rhino runs Java (not JavaScript)-based implementation of JavaScript, and doesn’t like to share super neat data types such as bytes with JavaScript. So if we want to convert these bytes into a string, we have to do it the Rhino way first, by using Packages.java.lang.String(). If we don’t, we might get something lame and unhelpful, like “[B@89e840”. That’s no good.
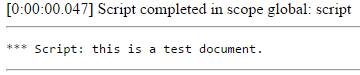
On line 13, we re-cast the variable to a String (in JavaScript this time) - primarily because I don’t trust Rhino’s type-casting since Java is not loosely-typed like JavaScript is. Finally, we print out the string we got from our attachment. If it was a text-based file, we should get something like this, displaying the text that was in the document:

“That works pretty swell” - I hear you say - “but hey wait a minute — I only told the GlideSysAttachment class the table my record was on, and the sys_id of the record. What if my record had multiple attachments? How would it know which one to get the bytes for, and all that jive?”
Good question — it doesn’t. .getBytes() always only grabs the most recent attachment. If this is not a text file, you might end up outputting a string that looks like this:
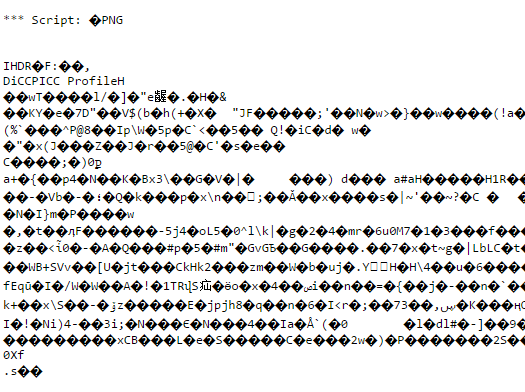
This… is also not helpful.
So, how do we determine which attachment gets parsed? Well, with some (see: a lot of) fiddling around in the undocumented API, and throwing various data objects at it in various ways, I was able to find the GlideSysAttachment.get() method. Using this method, there is indeed a simple way to get the text out of a specific attachment on a record!
While this method is simpler than what we had to do above, it does require that you know the exact name of the attachment you’re retrieving the value of in advance, which means that it’s not a perfect solution for every scenario. However, if you do know the file-name in advance, this is much easier:
var tableName = 'incident';
var sysIDOfRecord = '755d52b137b0b30090b68cf6c3990e6f';
var fileNameSansExtension = 'example text doc';

var grRecordWithAttachment = new GlideRecord(tableName);
grRecordWithAttachment.get(sysIDOfRecord);

var gsa = new GlideSysAttachment();
var textVal = gsa.get(grRecordWithAttachment, fileNameSansExtension);

gs.print(textVal);
The new and important bit is on line 10 above, in which we call .get(), and pass in a GlideRecord object containing the record to which the attachment is attached (not the sys_attachment record itself, like in the other Global method), and a string containing the file name (without the filetype extension).
If we use this method, once again, we get the output that we are hoping for - the text contents of our document:
Update 4/21/19: In Geneva+, the calculateMD5CheckSum method of the GlideChecksum class used below is not accessible unless you submit a ticket to ServiceNow, requesting that it be whitelisted. This used to be the only way to calculate an MD5 checksum using native functionality in ServiceNow Geneva. However, in Jakarta and later versions, the method below will work for calculating hashes in scoped scripts only.
For global, you may still going to need to rely on the calculateMD5CheckSum() method, depending on what version of ServiceNow you’re on.
There are a multitude of reasons that one might need to calculate MD5 checksums for attachments in ServiceNow. Here are some examples:
-
You’ve uploaded a file using SOAP/REST, and want to verify that the bytes came across correctly, so you have the system send back the MD5 checksum.
-
You want to check whether the file on the server matches the file you’re intent on uploading. If so, don’t upload, to save bandwidth.
-
You want to verify the integrity of an external database that includes mirrored attachments from ServiceNow, but don’t want to send across the entire file just to validate it.
Unfortunately, it sure doesn’t seem to be easy to generate an MD5 checksum from a file attachment in ServiceNow — which makes sense, if you think about it. The files are split into a myriad of 4KB pieces across your database, stored as strings of base64 encoded binary data. In order to generate an MD5 checksum, you’ll have to re-construct that file first — so that’s just what we’ll do.
var recordTable = 'incident';
var idOfRecord = '755d52b137b0b30090b68cf6c3990e6f';
var grAttachment = getAttachmentRecord(recordTable, idOfRecord, 'example text doc.txt', true);
if (grAttachment !== false) {
	var attachmentStream = new GlideSysAttachment().getContentStream(
		grAttachment.getValue('sys_id')
	);
	var gDigest = new GlideDigest();
	var base64MD5 = gDigest.getMD5Base64FromInputStream(attachmentStream);
	gs.info(base64MD5);
}

/**
 * Get the GlideRecord object for an attachment on a given record.
 * (Same getAttachmentRecord function as in Gist 1)
 */
function getAttachmentRecord(recordTable, idOfRecord, nameOfFile, exactMatch) {
	var grAttachment = new GlideRecord('sys_attachment');

	grAttachment.addQuery('table_name', recordTable);
	grAttachment.addQuery('table_sys_id', idOfRecord);

	if (nameOfFile && exactMatch) {
		grAttachment.addQuery('file_name', nameOfFile);
	} else if (nameOfFile) {
		grAttachment.addQuery('file_name', 'STARTSWITH', nameOfFile);
	}

	grAttachment.orderByDesc('sys_created_on');
	grAttachment.setLimit(1);
	grAttachment.query();

	if (grAttachment.next()) {
		return grAttachment;
	}

	gs.debug('Attachment for record on table ' +
		recordTable + ' with sys_id ' + idOfRecord +
		' not found with the specified arguments.');

	return false;
}
If all else fails, you’ll need to request access to the calculateMD5CheckSum() method of the GlideChecksum class from ServiceNow. Once you’ve got access to that, the below method should work.
var grAttachment = new GlideRecord('sys_attachment');
grAttachment.get('0003ea666f015600623008efae3ee4f7');
var md5HashSum = calculateMD5Hash(grAttachment);

function calculateMD5Hash(attachmentGR) {
	var attachmentInputStream = GlideSysAttachmentInputStream(attachmentGR.sys_id + '');
	var chksum = (new GlideChecksum()).calculateMD5CheckSum(attachmentInputStream);
	gs.print(chksum);
}
On lines 1-2, we get a GlideRecord referring to a specific record on the sys_attachment table. On line 3, we call our function.
On line 6, we instantiate an undocumented class: GlideSysAttachmentInputStream, and pass the sys_id of the attachment record to its’ constructor.
On line 7, we actually calculate the MD5 checksum using a method of the GlideChecksum class: calculateMD5CheckSum(), and we pass in the attachment input stream that we created on line 6.
That’s all there is to it. Don’t worry if you don’t understand entirely what these functions are doing. They’re hidden deep inside ServiceNow, and you’re unfortunately not really meant to understand precisely how they work.
Copying all of the attachments associated with a given record is fairly straightforward. You simply call the copy method of the nearly-undocumented GlideSysAttachment class, and pass in four strings:
-
The table you want to copy the attachment from (incident, change_request, etc.).
-
The sys_ID of the record you want to copy the attachment from.
-
The table that you want to copy the attachment to.
-
The sys_ID of the record you want to copy the attachment to.
This might look something like this:
Again however, you might notice that we haven’t actually told GlideSysAttachment which attachment we want it to copy over. In this case, that just means that it’ll copy over all of the attachments associated with the record we’ve chosen.
Unfortunately, there doesn’t appear to be a built-in way to copy one specific attachment associated with a record, when you have multiple. That’s okay though — now that we understand how attachments work, we can write our own!
copySpecificAttachment(donorTable, donorID, recipientTable, recipientID, fileName);

function copySpecificAttachment(donorTable, donorID, recipientTable, recipientID, fileName) {
	var donorAttSysID,
		grNewAttachment,
		linkToNewRecord,
		attDataRecord,
		newDocRecord,
		grAttachment = new GlideRecord('sys_attachment');
	grAttachment.addQuery('table_name', donorTable);
	grAttachment.addQuery('table_sys_id', donorID);
	grAttachment.addQuery('file_name', fileName);
	grAttachment.query();
	while (grAttachment.next()) {
		donorAttSysID = grAttachment.getValue('sys_id');
		grNewAttachment = copyRecord(grAttachment);
		grNewAttachment.setValue('table_name', recipientTable);
		grNewAttachment.setValue('table_sys_id', recipientID);
		grNewAttachment.update();
		linkToNewRecord = gs.getProperty('glide.servlet.uri') + grNewAttachment.getLink();
		attDataRecord = new GlideRecord('sys_attachment_doc');
		attDataRecord.addQuery('sys_attachment', donorAttSysID);
		attDataRecord.query();
		while (attDataRecord.next()) {
			newDocRecord = copyRecord(attDataRecord);
			newDocRecord.setValue('sys_attachment', grNewAttachment.getValue('sys_id'));
			newDocRecord.update();
		}
	}
}
function copyRecord(record) {
	var i,
		recordElement,
		recordElementName,
		recordTable = record.getTableName(),
		recordFields = record.getFields(),
		grNewRecord = new GlideRecord(recordTable);

	grNewRecord.initialize();

	for (i = 0; i < recordFields.size(); i++) {
		recordElement = recordFields.get(i);
		if(recordElement.getName() != 'sys_id' && recordElement.getName() != 'number')
		{
			recordElementName = recordElement.getName();
			grNewRecord.setValue(recordElementName, record.getValue(recordElementName));
		}
	}

	grNewRecord.insert();
	return grNewRecord;
}
Pro Tip: See how I didn’t document my code pretty much at all in the example above? Don’t do that. I removed any comments from my code because I’m going to explain it line-by-line in just a sec, but you should always do your future self a favor, and document your code thoroughly!
Wow, that’s some pretty dense code there. Let’s step back, and look at the high-level breakdown of what it’s doing:
-
Lines 4-8 are just setting up our environment. It is technically best practice to declare all or nearly all of your variables at the top of your function, but many people don’t like doing it that way. It doesn’t hurt anything if you don’t do it that way, so do whatever you’re comfortable with.
-
Lines 9-13: Get a GlideRecord with the actual sys_attachment record we’re looking to copy.
-
Line 16: Copy that sys_attachment record, using our custom copyRecord function. This super nifty function grabs all the fields on a given record, and makes a duplicate, copying over the values of every field (except sys_id, and number).
- Remember, the sys_attachment record essentially just contains metadata about the attachment. The actual bytes contained within the file, are stored in the sys_attachment_doc table!
-
Lines 17-19: Since our copyRecord function returns the GlideRecord object for the newly created record, we can now modify a couple of fields. In this case, we’re modifying the table_name and table_sys_id fields. This way, we’ve got an exact copy of the record we passed into that function, except for those two changes we’ve made. These changes associate the new sys_attachment record to our “recipient” record.
-
Lines 21-31: We create a new GlideRecord for the sys_attachment_doc table (which is where the data for the attachments is actually stored, so we’ll need to copy those entries too). We use a query to make sure we get all of the sys_attachment_doc records related to our specific sys_attachment record, and then we pass each one into our handy-dandy copyRecord function. Finally, we modify and then .update() the returned GlideRecord containing the new sys_attach_doc records.
The following are a list of attachment-related properties that you can access and modify in ServiceNow by typing sys_properties.list into the application navigator filter bar (and pressing Enter, if you’re on Geneva+/UI16+). You can either modify the value of a property in that list, or (if you don’t see a given property in the list), create it and set the value specified below.
Like the idea of being able to copy specific attachments, or specific records, but don’t feel like rewriting all that code and repurposing it for your instance? No problem, you lazy bum - we’ve got you covered! Just download the update set XML below, and deploy it into your instance - here’s how:
-
Download and extract this tool, and save it to your computer.
-
Elevate privileges to the security_admin role.
-
Navigate to System Update Sets -> Retrieved Update Sets.
-
Click the Import Update Set from XML link.
-
Click Choose File and select the XML file you downloaded, then click Upload.
-
Commit the update set.
-
Open the update set you just uploaded
-
Click Commit Update Set.
-
And that’s it, you’re done!
Thanks for reading, don’t forget to subscribe, and happy developing!
SN Pro Tips is owned and written by The SN Guys, ServiceNow consultants. If your organization could benefit from our services, we humbly welcome you to schedule some time to chat and share your goals with us, so we can help your business Grow With Purpose.
Comments